This is a how-to guide on building your own Android ROM. It’s something I’ve put together after my own struggle to build CyanogenMod for my Nexus One. The various source building guides on the Internet are often incomplete, inaccurate or just simply out-dated. I hope this guide will be useful for other like-minded users. Of course, given that Android is evolving so rapidly, as are the various mods, I shan’t be surprised that some day I might also run out of steam keeping my guide up-to-date.
Building the ROM is actually quite simple. But okay, okay, I know: It’s simple when you’ve figured out how to do it. I hope this guide will be useful to those wanting to build ROMs themselves.
What are we building?
Let’s nail down the scope of what this guide cover. Obviously this is not going to be a universal guide for all sorts of Android building. So here’s what I’ll cover:
- Building CyanogenMod 6 ROM. This is based on Android 2.2 (Froyo).
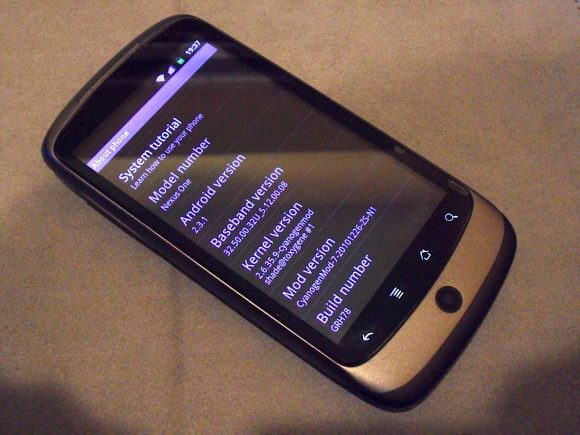
- I’m building for a Google Nexus One phone. CyanogenMod 6 also supports a variety of other phones like HTC Dream/Hero, Motorola Milestone, etc. But your mileage may vary with my guide.
- I’m building on a Linux box running Fedora 12. I know, the AOSP site has a preference for Ubuntu, but Fedora works just fine as long as you have all the pre-requisites. Important things are: JDK 6.0 (get the one from Sun, and I know, AOSP says JDK 5.0 but you really need 6.0), Git.
What will you need?
First, let’s set some reasonable expectations. It is going to be very tiring to talk about using Linux, using the bash shell, etc. So, obviously, some level of expertise and competency is expected of you, and that you should already have sorted out some things on your own. I am going to assume that you are familiar with Linux and the bash shell. You know how to find and install RPMs. You know how to get JDK 6.0 and install it. You have some basic experience compiling source code and developing programs. You know how to boot your phone into fastboot, recovery, etc.
Okay, with that out of the way, let’s move on.
- Your phone’s USB debugging setting needs to be turned on. Find it under Settings, Applications, Development, USB debugging.
- Your computer needs the Android SDK installed. Actually it’s mainly the adb program that you need. Copy adb to your $PATH. Make sure adb can talk to your phone. Run:
$ adb devices
Your phone’s serial number will be listed in the output if adb manages to talk to your phone. Otherwise, you have some USB troubleshooting to figure out (on your own). Fortunately, this is seldom a problem on Linux and Mac OS X platforms. - You also need fastboot. Get it from HTC Developer Center ADP page.
- Your phone already needs to have the official FRF91 ROM from Google installed, or something based off it such as CyanogenMod 6 (including ones that you build yourself). This is because you need to pull in some proprietary files from a working ROM. Alternatively, of course, you can source for the proprietary files yourself from elsewhere and figure out where to deposit them in the build tree. But you’re on your own.
- I know, the AOSP page says specifically that you need JDK 5.0 and not JDK 6.0. But trust me, you really need JDK 6.0, not JDK 5.0. The fancy Java alternative that comes with distros like Fedora won’t do either. Get the real JDK 6.0 from Sun. You don’t have to remove the Java that comes with your Linux distro, just make sure that when you build your Android source, your environment finds JDK 6.0 first. For example, if you installed JDK 6.0 into ~/tools/jdk1.6.0_19, then make sure that ~/tools/jdk1.6.0_19/bin precedes everything else in your PATH. E.g. you can modify your PATH as such:
$ export PATH=~/tools/jdk1.6.0_19/bin:$PATH - I can’t list out every package that your Linux box needs. On top of a typical Linux install, there are a few packages to watch out for: git, pngcrush, squashfs-tools.
I know, I said I’m doing the build on Linux. But most of the time, I prefer to connect my phone to my MacBook Pro running Mac OS X, from where I will do my ROM flashing and other phone mucking. So, if you are like me, get fastboot.exe (for Windows) or fastboot-mac (for Mac OS X), as well as the respective Android SDK for the other box that you want to use.
You still need adb on the build box, though, because it’s the easiest way to pull in proprietary files from your phone into the build tree.
Let’s build
There are a few parts to it, actually, and before you can do any building, you need to get the source and setup your repository.
First setup the repository.
- Get the repo tool and put it somewhere in your path. E.g.:
$ curl http://android.git.kernel.org/repo > ~/bin/repo
$ chmod 755 ~/bin/repo - Create a working directory:
$ mkdir froyo
$ cd froyo - Initialize the repository:
$ repo init -u git://github.com/CyanogenMod/android.git -b froyo
You will be asked some questions about your name and email. Just go along with it. - Start pulling in the source.
$ repo sync
Syncing the repo will take some time initially, of course. Subsequently, it will run faster since only the new changes need to be pulled in.
Next, prepare the build tree.
- Setup the environment:
$ source build/envsetup.sh - Choose build target:
$ lunch cyanogen_passion-eng
Or if you run lunch without any arguments, you’ll get a menu to choose the build target. - Now, you need to pull in some proprietary files that are not included in the Git repository. Connect your phone to your build box, then run a script to pull the files in:
$ cd device/htc/passion
$ ./extract-files.sh
$ cd ../../../vendor/cyanogen
$ ./get-rommanager
$ cd ../..
Remember, you need to do all these from a phone that already has FRF91 software installed, or a CyanogenMod 6 ROM installed (those you build yourself will do fine too).
Ok, we do the actual build now. There are a few output types:
- To get image files that you can flash via fastboot:
$ make
This will produce boot.img and system.img in out/target/product/passion/ which you can flash using fastboot like so:
$ fastboot flash boot boot.img
$ fastboot flash system system.img - To build an OTA package that you can flash easily via recovery:
$ make otapackage
$ vendor/cyanogen/tools/squisher
Then look for update-cm-*.zip file in out/target/product/passion/, which you flash via recovery.
The second method results in the files that Cyanogen posts for download.
Remember the first boot after you flash the new ROM will be slow, as it needs to regenerate the dalvik-cache. Don’t panic if it seems like your phone is taking a long time to startup.
Have fun.
what is adb?
Adb is the Android Debug Bridge, a tool that comes in the SDK.
Every time I try to pull the files from the phone via ./extract-files.sh it says “adb not found” What am I doing wrong?
I guess adb isn’t in your path. Just make sure it is. E.g. export PATH=path/to/adb:$PATH
Thank you very much for getting back with me so quickly! The path is in the bash.bashrc file right? If yes than that is where I have placed the export PATH. The path will begin in the “home” directory correct? “export PATH=/home/geoff/Downloads/android-sdk/tools:$PATH” is the exact path I have.
The file should be .bashrc in your home directory, but yes, otherwise the export line looks correct. To be sure, you can always type “echo $PATH” at the shell prompt to confirm that your PATH indeed includes the directory containing adb.
i was trying to extract while being logged in as SU and the adb path was not listed while in SU. Logged in regular and the script ran fine. Thanks for your help. If you could possibly help with one other thing… When I go to “make -j4” It will get the build info and then I get this message “frameworks/policies/base/PolicyConfig.mk:22: *** No module defined for the given PRODUCT_POLICY (android.policy_phone). Stop.” and the build stops there. Am I doing something wrong? I thought I had all the repo’s I needed. Am I missing an HTC proprietary file? Any help would be appreciated. Thanks
Thanks for this writeup! I’m now able to test some keyboard fixes for my slide. Hopefully the community will benefit from this.
zit, Thanks for all the help you gave me around a month ago. It really helped me in beginning my builds. I build for the heroC but, theory is the same. Many thanks and will give credit in my build posts!
Hi,
I’m trying to build CM6 for my nexus one. I working in Ubuntu 11.04 VB.
I am having a couple of issues:
1. When I do a “repo sync” I get “error: Cannot fetch CyanogenMod/android_device_harmony” so I run “repo sync -f” and I get the following:
Fetching projects: 16% (34/210) fatal: remote error:
Could not find Repository CyanogenMod/android_device_harmony
error: Cannot fetch CyanogenMod/android_device_harmony
warn: –force-broken, continuing to sync
Fetching projects: 100% (210/210), done.
error: revision master in CyanogenMod/android_device_motorola_morrison not found
Do you know what could be the problem?
Thank you.
How to connect NUS wireless, if I use the phone with Android system?
This is the wrong page to ask.
Bro Im compiling CM6 for my lg optimus me p350 but im having error in sycing the repo
wenever i try repo sync
keyur@keyur-laptop:~/cm$ repo init -u git://github.com/CyanogenMod/android.git -b froyoYour identity is: keyur
If you want to change this, please re-run 'repo init' with --config-name
repo initialized in /home/keyur
keyur@keyur-laptop:~/cm$ repo sync
Fetching projects: 1% (3/205) android.git.kernel.org[0: 149.20.4.77]: errno=Connection refused
fatal: unable to connect a socket (Connection refused)
android.git.kernel.org[0: 149.20.4.77]: errno=Connection refused
fatal: unable to connect a socket (Connection refused)
error: Cannot fetch platform/bootable/bootloader/legacy
Looks like it might be the git server that is having problem. Maybe just try again a bit later?