 I’ve talked about the Raspberry Pi, and mentioned how it can be used to build a home theatre media centre. Let’s get down to business and build one. It’s relatively straight-forward, and it won’t cost much either. If you’re a hands-on person, this will be a fun weekend project.
This project will basically involve taking a Raspberry Pi, connect up some parts, put software into it, and then turn it on. There’s also some post-installations steps. It’s easy. There’s no soldering involved, so this doesn’t count as a hardware project. Just to set the right expectations, you will need to be able to follow technical instructions. There’s no magic wizard that will mint out a Raspberry Pi with media centre ready-to-go.
We will use the XBMC software. XBMC is a free and open source cross-platform software media player and entertainment hub for digital media for Home Theatre PCs. XBMC has many cool features.
The first order of business will be to acquire the parts. I call this the Bill Of Materials (BOM).
| Item | Price | Source | Comments |
|---|---|---|---|
| Raspberry Pi Model B | $45 | Element 14 | I recommend the Model B even when you don’t plan to use the Ethernet port, because it has more RAM than Model A. |
| 8GB SD card | $6.50 | Best Bargain | This is for a Class 4 SD card. You might want to consider a Class 10 one for just $2 more, although the speed is not required. |
| USB power supply | $7.18 | Element 14 | Optional: The Raspberry Pi needs a 1A USB power supply. If you already have a USB port at your TV, you don’t need this. |
| USB Wi-Fi dongle | $22.33 | Element 14 | Optional: There is built-in wired Ethernet in the Raspberry Pi Model B. Wi-Fi could be more convenient though. There are certainly cheaper Wi-Fi dongles around, but I went with the one from Element 14. |
| Raspberry Pi case | $9 | Element 14 | Optional: This is the case to contain the Raspberry Pi. If you want this, get it bundled with the Raspberry Pi Model B, otherwise this item on its own will cost more than $9. |
| Logitech MK220 wireless keyboard and mouse | $25 | Fuwell | Optional: I suppose you may already have a keyboard or mouse available to use. I suggest using a wireless setup otherwise you would be tethered to your Raspberry Pi media centre. There is also an official XBMC remote app for both Android and iOS, so you can really do without a keyboard and mouse. |
At the least, you would need the Raspberry Pi Model B and the SD card, costing you only $51.50. This is a really cheap media centre. However, do check out the other optional items in case you need them as well. For example, if you want to connect the media centre to your network wirelessly, then you’d absolutely need a USB Wi-Fi dongle.

A couple of items are from Element 14. They apparently direct consumers to buy Raspberry Pis from other resellers in Singapore who mark up the price. I suggest to just try buying directly from Element 14.
Alright, once you’ve gotten the parts, we’re ready to get started.
First, you have to put the Raspbmc software into the SD card, and to do that, you need a computer with a SD card reader. Then, use that computer to get the Raspbmc image and write it to your SD card. The easiest way to do this is to use the Raspbmc Installer.
- On Windows, download this Raspbmc Installer. Unzip the contents, and run
setup.exe. - On Macs, run these command:
$ curl -O http://svn.stmlabs.com/svn/raspbmc/release/installers/python/install.py
$ chmod +x install.py
$ sudo ./install.py
Insert your SD card and make sure you identify the correct one in the installer. I’d suggest removing all removable disks. On Macs, disk0 is the internal system disk. Make sure you don’t choose that.
The installer will download a small bootstrap Raspbmc software to put into the SD card, which will later then download the rest of the Raspbmc installation.
After the SD card is written, the installer will ask if you want to configure “post-installation settings”. You should say yes if:
- You are using a Wi-Fi dongle and thus quite likely need to specify your Wi-Fi SSID and encryption keys.
- You use a wired network that requires static network settings.
Wait until the installer is done with all its work.
Alternative method: Get the Raspbmc software from the Raspberry Pi Downloads page by clicking the Download ZIP link for RASPBMC. An experienced Linux user will probably know just how to take it from there, but it’s still more work yet to configure network settings later. I’d suggest to just use the Raspbmc Installer.

Assemble the parts: Put the SD card into the Raspberry Pi’s SD slot. Connect the HDMI cable from your TV. Connect a USB keyboard and mouse (or the wireless dongle for your keyboard and mouse). Finally, connect the microUSB cable for supplying power to the Raspberry Pi.
Your Raspberry Pi will immediately start to boot up. Don’t forget to check that your TV is selected on the input source from your Raspberry Pi.
The following process is largely all automatic and you don’t actually have to do anything. But just to allay any anxiety, I’ll mention what you can expect to see happening.
- Raspbmc will show up on the screen in text mode. It’ll look like how a Linux PC boots up. Then there’s a text-based installer that will run. This will download the rest of the latest Raspbmc software, kernel, kernel modules and bootloader. This could take 10 to 15 minutes or so, and it depends very much on the network speed. When it’s done, the Raspberry Pi will reboot.
- The Raspberry Pi logo will appear on screen and may stay there for a couple of minutes during this first boot. Then Raspbmc is going to do more setup, before it will reboot the Raspberry Pi again.
- You’ll see the Raspberry Pi logo again, then a message about the Raspbmc Updater doing more and more updates: service management, then XBMC. After that, the Raspberry Pi reboots again.
- By now, you must be very familiar with the Raspberry Pi’s logo. This time, the boot up will be very fast, and you’ll see the main XBMC home screen very soon.
Wait a little while more, Raspbmc will display a language selection dialog. When it appears, just use your keyboard or mouse to make the selection.
The Raspbmc installation is done, and you can start using it. But there are a few more setup steps that you should take care of.
- Set the correct timezone so that Raspbmc displays the correct time. From the home screen, go to: System, Settings, Appearance, International, then set Timezone country.
- If you connect to a TV, you probably need to calibrate the video output so that the full picture is properly displayed. From the home screen, go to: System, Settings, System, Video output, then Video calibration. Make the adjustments as needed.
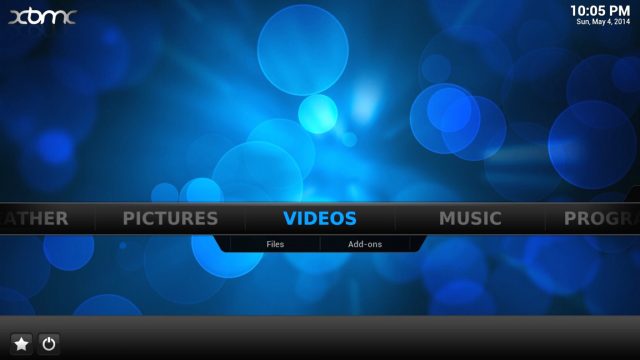
Explore the Raspbmc interface. Notice that you can add media sources via USB devices connected to the Raspberry Pi, as well as accessed over the network.
If you use USB storage devices, remember that the Raspberry Pi cannot provide much power over its USB port, so you may need a powered USB hub. There are only two USB ports on the Raspberry Pi too, so you may need the powered USB hub anyway.
I’ll suggest to access your media wirelessly. Put them in a Windows or Linux PC and share them out. The Raspberry Pi can access network content via SMB (Windows file share) or NFS.
Other cool features of Raspbmc include support for Apple’s AirPlay/AirTunes, so you can wirelessly stream videos and music from a Mac or iPhone or iPad to the Raspberry Pi.
I mentioned earlier that there’s an official XBMC remote control software available from both the Google Play Store and Apple iOS App Store. Search for “XBMC remote”.
Have fun with your new Raspberry Pi media centre!
View Comment Policy