

This page covers the more advanced topics about using a Mac in NUS. For the basics, please check out Mac @ NUS first.
Address Book
You can access NUSNET account information (including SOC UNIX accounts) through the Mac’s Address Book application. These address book entries can be used in various Mac applications such as Mail.app, so that for example, you can type a name, and have Mail.app auto-complete with that person’s email address found through Address Book. These instructions are for Leopard.
- Start the Address Book application.
- Open the Prefrences window (press Cmd-,). Then click on the LDAP button at the top.

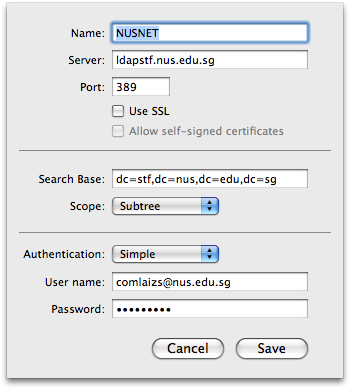
- Enter the following details:
Name: Anything to describe this address book. E.g. NUSNET.
Server: ldapstf.nus.edu.sg (or ldapstu.nus.edu.sg)
Search Base: dc=stf,dc=nus,dc=edu,dc=sg (or dc=stu,dc=nus,dc=edu,dc=sg)
Authentication: Simple
User name: Your NUSNET account (xxx@nus.edu.sg)
Password: Your NUSNET password 
- Quit Address Book.

You will be able to use Address Book to find contacts in the NUSNET address book. You can also do so from the Mail.app.
For Snow Leopard, it’s similar to the above. Continuing on from the Preference window:
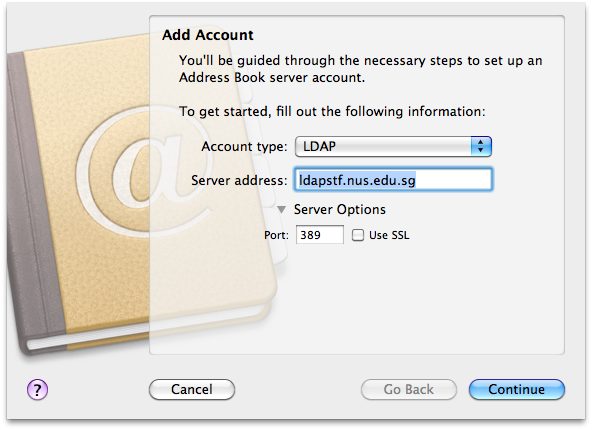
- Click ont the Accounts tab, then click on the + button to add an account.

- Choose LDAP for the Account Type, then fill in the Server address (as for Leopard). Then click Continue.

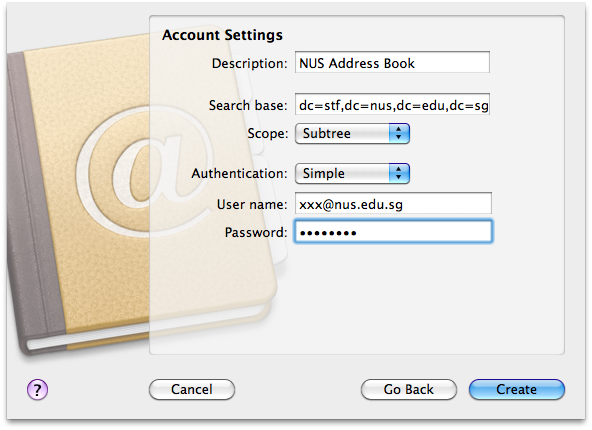
- Fill in the remaining details as above for Leopard. Then click Create.

- That’s it. Close the Preferences window.

For SoC Address Book, do the following:
- Server: ldap.comp.nus.edu.sg
- Search Base: ou=People,dc=comp,dc=nus,dc=edu,dc=sg
- Authentication: None
That’s it.