


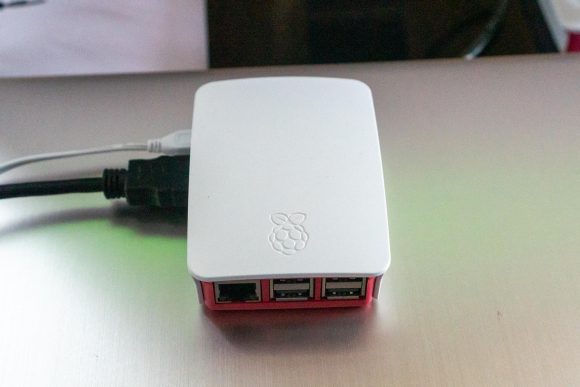
We’ve had a Raspberry Pi based clock display at work for many years, and even more prior to that using another embedded PC hardware. There has been several iterations of “updates”. Blessed with newer hardware and better software, the current version is quite capable and simple to implement.
[Note: Project is no longer maintained.]
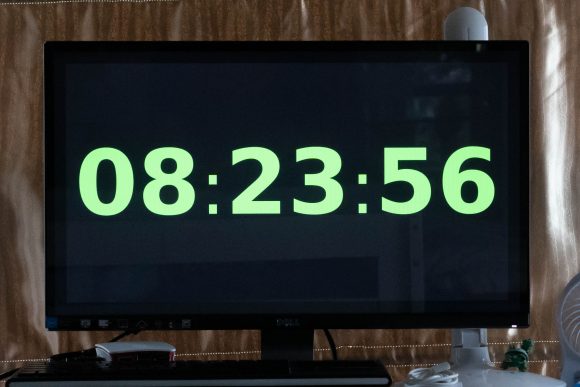
This project originally started as a proof-of-concept to use simple hardware as an alternative to commercial LED clocks. Commercial 8-segment LED clocks could have cost about 4 to 5 times that of a Raspberry Pi based system connected to a monitor at the equivalent “font size”.
The “clock” that you see on the Raspberry Pi’s display, however, is really just a browser canvas (chromium browser), with Javascript painting the text. As you might know, if you have Javascript and a web canvas, you can very easily make any app to draw anything you want on the screen. This solution doesn’t have to be just a clock; it can be anything you can imagine with Javascript. You can also easily connect it to any backend, whether to pull data or integrate with some other app or system. It’s infinitely more capable than a commercial 8-segment LED clock.
Here’s my present Raspberry Pi clock recipe.
How-To
1. Create Raspberry Pi Boot Disk
First, get the latest Raspbian Buster Lite image and put it in a MicroSD card. Windows users can use Rufus, while Linux and macOX users can just use dd directly.
2. Post-Boot Setup
Boot up with the new MicroSD card. Raspbian will try to expand its filesystem to fill the entire MicroSD card’s capacity.
When the login prompt appears, login with user pi and password raspberry.
Run sudo raspi-config. There are quite a few things to do.
First, go to 1 Change User Password to set the password for the pi account. This makes it more secure, and something sensibly needed when you want to enable remote SSH access to the Raspberry Pi.
Then, go to 3 Boot Options, B1 Desktop / CLI, select B3 Console Autologin. This sets your Raspberry Pi to autologin and run the clock app (i.e. the web browser).
Then, 4 Localisation Options, I4 Change Wi-fi Country, and choose the appropriate country for you.
Then, still under 4 Localisation Options, go to I2 Change Timezone, and pick the appropriate timezone for you.
To setup network, go to 2 Network Options, then N2 Wi-fi, and configure as needed.
It’s most useful for subsequent management to have remote SSH access. Go to 5 Interfacing Options, P2 SSH, and choose Yes.
You might have to explore 7 Advanced Options, A2 Overscan, and choose Yes depending on how the Raspberry Pi’s display gets rendered on your monitor. In all likelihood, you will need to configure /boot/config.txt, but that’s out of the scope of this guide.
Now, make sure your Raspberry Pi is up-to-date on all its software.
$ sudo apt update
$ sudo apt upgrade
3. Install Other Needed Software
We need a bunch of other stuff.
sudo apt install –no-install-recommends xserver-xorg x11-xserver-utils xinit openbox chromium-browser xdotool
(That’s one long line, make sure you get all of it.)
Remember we started off with a Rapbian Buster Lite image, so this has minimal software. There is no X, for example, so we’ll need to pull the required software now.
4. Get the Clock App
You can clone my pi-clock stuff from GitHub. Login to the pi account and run:
$ mkdir ~/tmp
$ cd ~/tmp
$ git clone https://github.com/lzs/pi-clock
$ cd pi-clock
$ ./install.sh
This will do several things:
- Create and populate the directory
~/pi-clockto hold web content to be served locally. - Add a .bash_profile to start the X server automatically upon login.
- Add an Openbox autostart configuration to do a few things: setup DPMS, clean up chromium’s previous exit, launch a local webserver, then launch chromium-browser at the local URL. Chromium is launched in incognito, kiosk, without warnings and popups, so there is minimal distraction.
- Install a checkhealth script and a cronjob to call it; this will reboot the Raspberry Pi if there is persistent network reachability problems.
You can read install.sh as well as the other files so get an idea of how things work. All the web content is presently served out of ~/pi-clock, but you can easily change to host that at a central web server.
Other Notes
Notice that I included the install of xdotool although I don’t actually use it. The reason for needing xdotool is to easily get chromium to do things as if a user had been interacting with it. For example, if you need to command chromium to refresh the current page:
$ export DISPLAY=:0.0
$ xdotool key ctrl+shift+r
You can SSH into the Raspberry Pi remotely to run the above. The DISPLAY environment variable is always needed to tell X programs where to find the display device to use.
If you need to tell chromium to change to a new page, you could run:
$ DISPLAY=:0.0 chromium-browser https://somewhere.com/
(That’s another way to specify the DISPLAY environment variable setting.)
The above would not launch a new chromium browser, but simply tell the current running one to go to another URL.
Look in the ~/pi-clock/config.json.dist for an example to turn the clock into a countdown timer.
Remember that the entire display is simply a chromium-browser canvas. Anything you can make a chromium do, you can put on this display. Let your imagination run wild with ideas on what you can do.