The one thing that is upgradable in the Microsoft Surface Laptop 7 is the NVMe storage. Upgrading is easy. In fact, I recommend upgrading the storage yourself if you’re considering buying a larger storage configuration. You’ll get better (faster, less power draining) storage, and cheaper too!
In case you’re wondering, I did want to write a more in-depth technical review of the Surface Laptop 7, but things happened, and I thought this bit about storage upgrade is more interesting to write about first. I’ll take the opportunity to share some of the performance stats in relation to storage in this post.
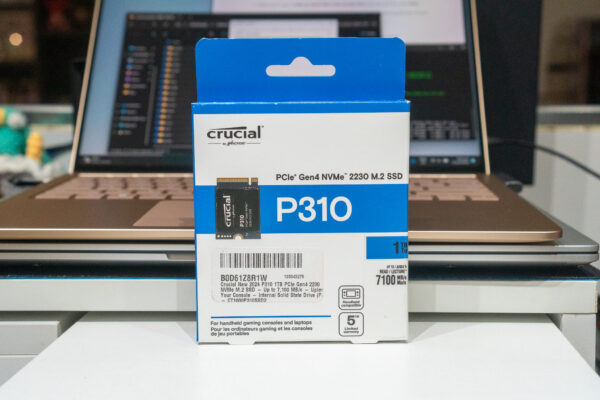
There are two really good things going for a DIY upgrade of the storage in the Surface Laptop 7. First, there is a really good upgrade option available. It is the Crucial P310 NVMe SSD which only just launched earlier this year. The timing is great. The other good thing is about how the Surface Laptop 7 makes DIY upgrade fairly easy. I did unearth some potential issues while researching, but it turns out that they weren’t real problems.
The Surface Laptop 7 uses a 2230 form-factor M.2 NVMe slot. Desktop motherboards and most laptops typically use M.2 slots that accommodate 2280 form-factor modules. Comparatively, the modules in 2230 form-factor are less common, and thus, there are fewer buying options available.
There are, of course, still several options out there. While researching, I came across this comparative review of 2230 form-factor NVMe for Steam Desk. The Crucial P310 was the 2nd best in performance, and also quite importantly, gave the Steam Desk the longest battery runtime. The latter part means that the Crucial P310 sipped the least power, which is important because you want the laptop to also run the longest on battery. You can read an in-depth review of the Crucial P310 from Tom’s Hardware.
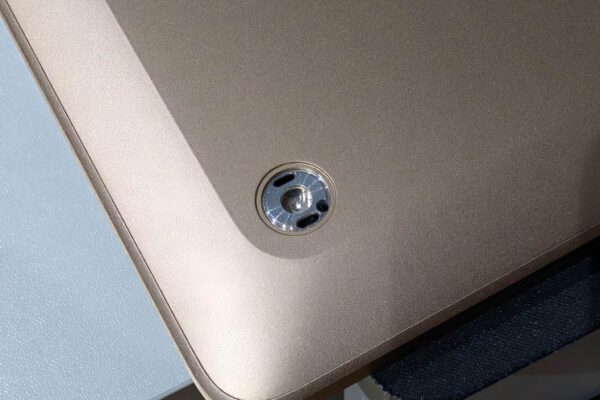
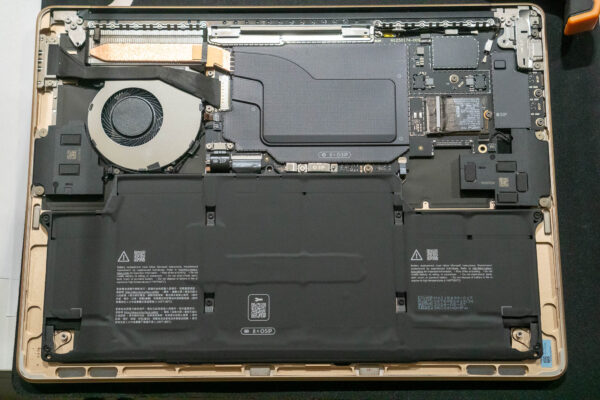
Replacing the NVMe SSD on the Surface Laptop 7 is relatively simple. Microsoft provides detailed instructions on their website to disassemble many more parts of the Surface Laptop 7 than you’ll need for a simple NVMe storage replacement. The first thing you’ll need to do is the remove the rubber feet which, kudos to Microsoft, not only has no glue and can simply be plucked out by just getting your finger nail under the feet. Later on, you can just push the feet back in!

Officially, Microsoft lists the screws on the bottom cover, as well as the one holding the NVMe module, as Torx Plus 5IP screws. Yah not the usual Torx T5. This got me fussing over the difference between Torx Plus and Torx, even though it is said that Torx T5 screwdrivers can be used on Torx Plus 5IP screws. I did a bit of research and found that Torx Plus screws are “improved”. That’s good, right? Unfortunately, not only did I not have any Torx Plus screwdrivers, but I also found that they are much more costly, perhaps because they are lesser in demand.
I gave up in the end and decided to just use a standard Torx T5 screwdriver. They do work. You shouldn’t need to worry if you don’t have any Torx Plus screwdrivers around.
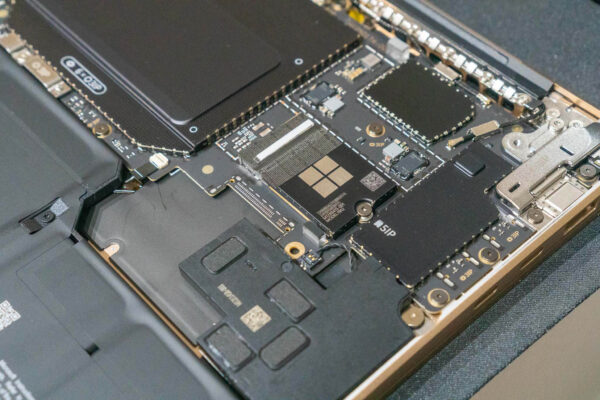
The original NVMe module from Microsoft is interestingly in a sort of a case (with the Windows logo in the photo below). I don’t know why Microsoft feels the need to also put a sticky tape over the connector.

Just remove the tape, remove the screw, and you can just remove the original NVMe module, and put the new one in its place. I opted to put back the sticky tape even though I don’t really know why it’s needed.

Then, put back the bottom cover. Due to their very exactly fit, you may need to take some care in positioning the cover before putting the screws on them. Lastly, put back the rubber feet over the screws. The hardware installation is done.
Since it’s now a completely blank storage, you’ll have to install Windows in it again. Microsoft provides official recovery images; look it up on their website. Interestingly, they are huge at over 12 GB in size.
Now, let’s talk about performance in CrystalDiskMark.
| Read/Write (MB/s) | Original Storage | Crucial P310 |
| SEQ1M Q8T1 | 4038.29/3549.74 | 6999.08/5936.06 |
| SEQ128K Q32T1 | 1962.54/1402.48 | 2021.12/1669.74 |
| RND4K Q32T16 | 600.1/552.15 | 360.94/519.61 |
| RND4K Q1T1 | 39.31/59.04 | 40.02/148.17 |
Generally, the Crucial P310 does better than the original NVMe that comes with the Surface Laptop 7, except for the RND4K Q32T16 test. It got me wondering what the original NVMe on the Surface Laptop 7 was. At least on mine which came with a 512 GB storage, the actual NVMe module appears to be a Western Digital PC SN740 NVMe SSD. This NVMe is included in the comparative review I referenced above, and it didn’t seem like it fared as well as the Crucial P310. This seems to be the general case for me as well, only quite puzzling that the SN740 did so well in the RND4K Q32T16 test.
The Crucial P310 is relatively inexpensive. Considering how storage upgrades from Microsoft for the Surface Laptop 7 are quite expensive, it is more worthwhile to get the upgrade on your own, unless you need some other upgrades (e.g. RAM or processor). I do recommend, for most people, the base spec Surface Laptop 7 13-inch with the Snapdragon X Plus processor would suffice in terms of compute performance. If you take the 256 GB storage option, the Surface Laptop 7 will cost you only S$1,599. It will be even less with education discount, if applicable to you. Simply upgrading from 256 GB to 512 GB would cost you $348 from Microsoft. The upgrade to a 1 TB Crucial P310 would only cost $130-ish.
The storage upgrade on the Surface Laptop 7 is something quite easy to do, and it will be worth your while to do it yourself.
I used the exact same SSD for my Surface Laptop 7 and got a HUGE battery drain problem! Even in Standby, the battery drain was like 10% in a few hours. And even while actively using the SL7, the battery drain was just insane.
I hadn’t had any problem before installing this SSD.
Any suggestion why that was happening?
That doesn’t sound good. Unfortunately, I don’t have any suggestion as to what might be wrong. Mine has been working fine so far.
Make sure you run “winsat formal” from the command prompt to ensure it changes any settings for Windows to be optimised to your new SSD.