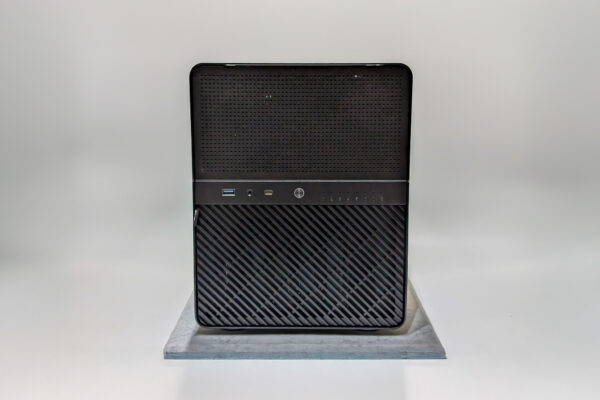
I’ve built clunky NAS using tower cases in the past. However, for my NAS build this time around, I wanted something diminutive. Ideally, it would be something as compact as one of the Synology or QNAP appliances. I did not manage to find anything that compact, and finally ended up with the Jonsbo N3.
Finding a NAS case has gotten slightly easier these few years. The situation was quite different when I last built a NAS about 8 years ago. At that time, I ended up with a tower PC chassis. It accommodated a generous number of hard disk drives (8x 3.5-inch, 2x 2.5-inch, and additionally 2x 5.25-inch external bays). It was, however, a very clunky case.
These days, there are quite a few options for DIY NAS cases. One company, Jonsbo, even has a series of cases that are optimised for NAS builds. Given that I wanted a compact case, one of the options I had identified earlier on was the very nice looking Jonsbo N1. This case accommodates 5x 3.5-inch drives. I do have a hard requirement for more than 4x 3.5-inch drives, but I would ideally prefer to have 6 at least. I also considered the Jonsbo N2, which had more room and thus easier to work with, but it was also limited to 5x 3.5-inch drives. There’s also the Jonsbo N4, which accommodates 6x 3.5-inch and 2x 2.5-inch drives.
The Jonsbo N3 is larger than the N1 and N2. However, despite being slightly smaller than the N4 volumetrically, the N3 accommodates a generous 8x 3.5-inch hard disk drives, plus two more fixed 2.5-inch drives, while still leaving more space for longer PCIe cards and more height clearance for taller CPU coolers. The N3 seems to make more optimal use of space, though it is limited to mini-ITX motherboards, while the N4 can accommodate slightly larger micro-ATX motherboards.
You can probably see that I mind the compactness of the NAS case a lot. I don’t want the NAS to take up too much desk space or shelf space, and certainly not floor space. The N3 is pushing into “clunky” territory by my definition, though perhaps reasonable for an 8-bay case considering that the QNAP TS-873A is only 9% smaller volumetrically. A 6-bay one might have been more optimal, though Jonsbo does not offer such a model.
I ultimately chose the Jonsbo N3. I figured that the roomier interior for the motherboard makes it more suited to DIY builds. It is hard to find everything of exacting size if one has to work with a case that has extremely limited space.
The TL;DR summary of the Jonsbo N3 is that it’s a solidly built metal chassis that accommodates a mini-ITX motherboard with double-width PCIe card support, requires a SFX power supply, can support 8x 3.5-inch hot-swap disks, and holds 2x fixed 2.5-inch disks.
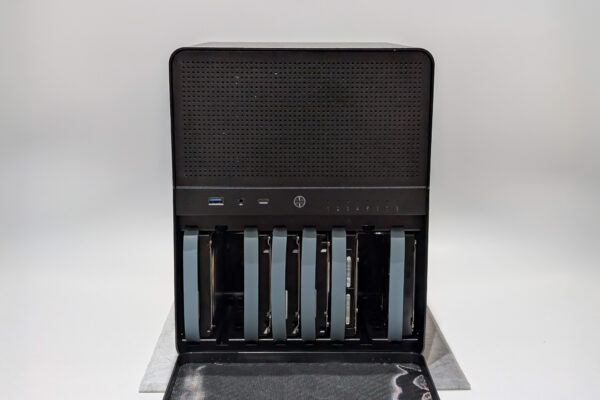
The N3 case has two main cavities. The top half houses the motherboard and PSU, while the bottom half holds the 8x 3.5-inch disk bays. The case is very well ventilated from all sides.
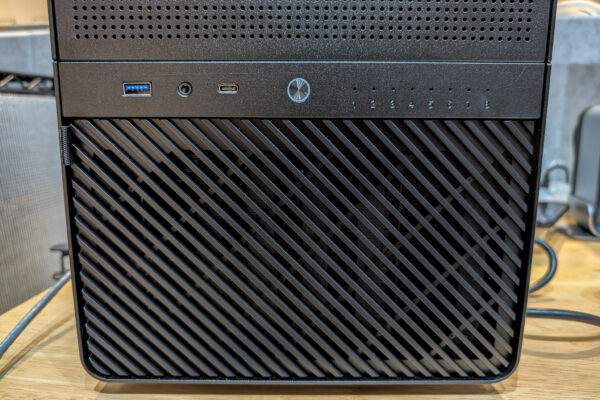
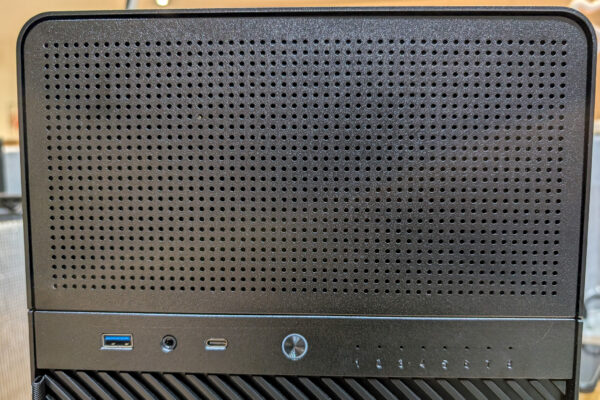
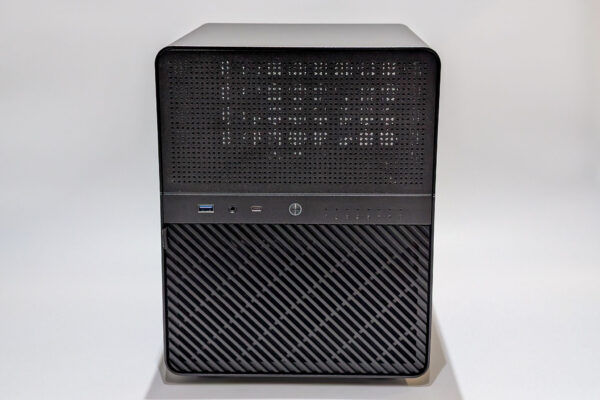
On the front, there is a USB 3.0 Type-A port, an audio jack, a USB 3.0 Type-C port, a button with LED ring, and 8 LED disk activity indicators. There’s only one button, so you’ll have to choose whether to wire that for power or reset function.
The front panel is magnetically attached, making removal a simple process of just pulling on the fabric tab at the top left corner, and thus providing very easy access to the hot-swap disk bays. The entire panel is also ventilated, with a fixed mesh filter behind, so all the hard disk drives will enjoy direct fresh air drawn in from the front.
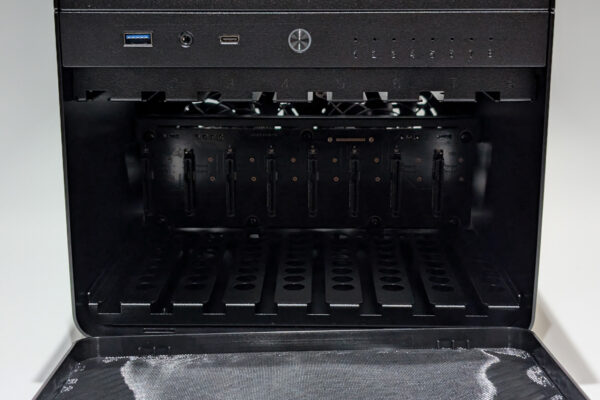
Jonsbo has a rather unique way of using rubber attachments instead of typical drive trays for slotting hard disk drives into the disk bays. There are two or four rubber gaskets screwed into each drive, plus an additional rubber strap attached to the front. The total of four or six rubber contact points hold the drive in the slot, while also providing some dampening from vibrations.
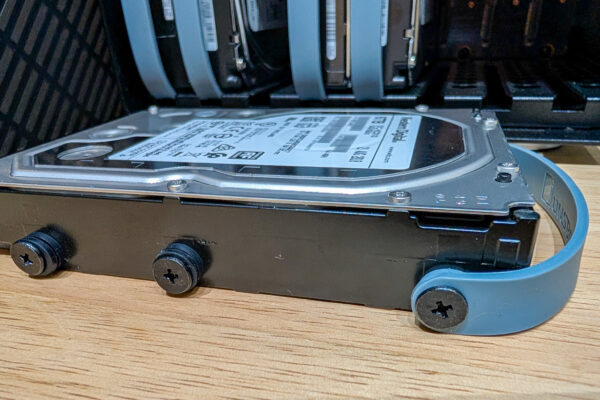
I don’t know if this is about cost-cutting, though I can’t imagine that drive trays would have cost that much more. For now, these rubber attachments seem to work. The strap may stretch a little when pulling out the disk, and more so when the fit is tight. You probably won’t be replacing disks all that often, so I don’t see an immediate problem of the rubber strap breaking or becoming loose.
However, I do wonder over the long term how the rubber straps will hold up. Will the strap become hard and brittle after 5 years? Will it snap when you attempt to pull out a drive 6 years later? Jonsbo seems to think these rubber attachments work, because they’ve been used since the N1 launched in 2021, and still continues to be used in the N5 launched in 2024. This won’t be a showstopper, but it’s definitely the worst part of the Jonsbo design. I prefer a toolless drive tray any time.
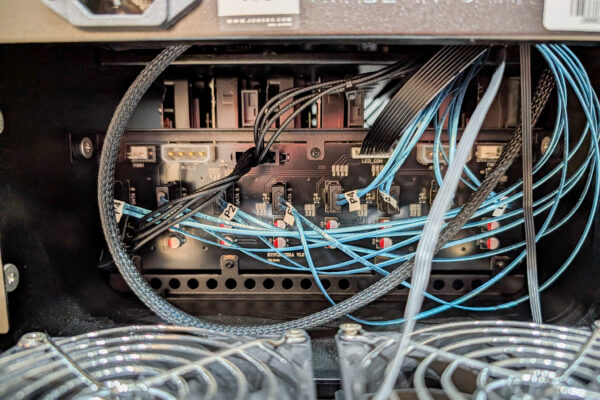
The rear side of the backplane has individual SATA connectors for all 8 ports, two molex power connectors and one SATA power connector. There are also 2x 3-pin chassis fan connectors for the 2x 100×25 mm fans included and attached to the rear cover behind the disks. (Note that in the photo, I have replaced those two 100×25 mm fans with something else.)
There’s a fair bit of space between the rear cover and the backplane to stash/manage all the SATA and power cables. Considering there are 8 drive bays, you will have a lot of cables to deal with. I am using an SFF-8643 to 4x SATA connector splitter from my motherboard, and an SFF-8087 to 4x SATA connector splitter from a HBA, to connect all the 8x SATA slots. These splitters use fairly thin cables.
The upper section of the N3 case is a relatively spacious cavern for a 170 x 170 mm mini-ITX motherboard and a SFX power supply unit. The front is completely covered with small ventilation holes.
The location of the power supply is quite interesting. If you refer to the photo below, the Jonsbo N3 case is facing right, i.e. the front of the case is on the right and the back of the case is on the left. Notice how the PSU is located next to the front end of the case? This is in contrast to how the PSU is usually at the back of the case.
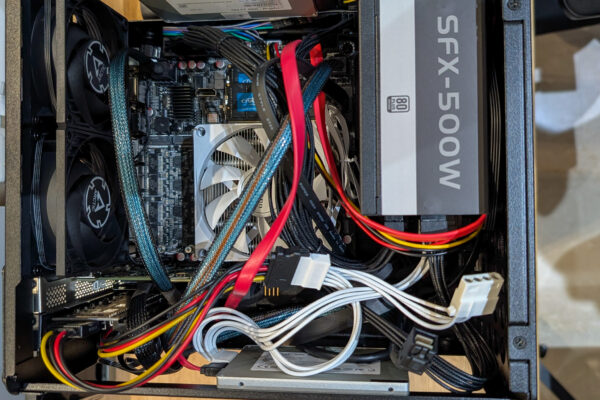
Don’t worry, the power cord still attaches to the back of the N3 case. Internally, a short power cord runs from that external connector to the PSU up front. The PSU is entirely within the case, which means its physical power switch, if any, will not be accessible. Ventilation for the PSU is fine because the back of the PSU (which faces the top in the photo) can exhaust air out through ventilation slots on the side of the N3 case, while its intake (which is facing right in the photo) can draw air in front the front panel.
I love this PSU arrangement because the design makes optimal use of the space in the case. The maximum supported SFX PSU length is 105 mm, which is fairly common. As you can see, there is ample room to run cables.
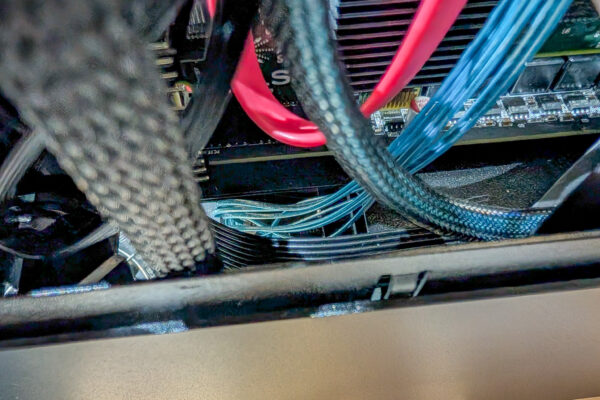
There’s a large hole to easily run cables from the top half to the bottom half of the N3 case. This is particularly important if you use regular SATA cables that are comparatively chunkier than what I have. There are also other access holes below the motherboard to reach the bottom half of the chassis, so some cables like LED activity indicators can go through there.
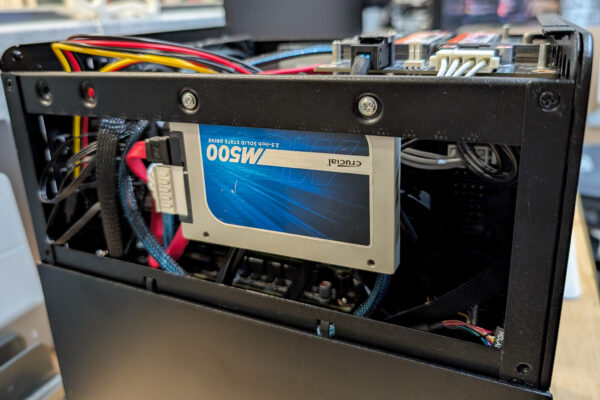
Officially, Jonsbo says the N3 supports only one fixed 2.5-inch SSD. It is on the right side of the case. However, as you can see in the photo below, there is a perfect spot to attach another 2.5-inch SSD on the left side. They even provided enough screws!
The cover for the top half fully opens to allow access from both sides and the top. If I may complain, the cover is secured by 4x Allen screws. They are nice flush screws that don’t protrude from the surface, but I’m sure Philips screws will work just as well. The Allen key is provided, though it is something that is begging to get lost, and many people likely don’t have a right-sized replacement on hand.
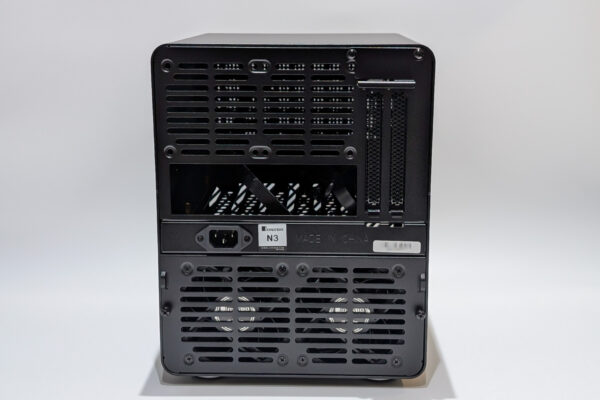
There are two more fan mounts on the back, suitable for 90 mm fans, for the top half of the chassis. These fans are not provided. (The only fans provided are the two for the bottom half.)
The Jonsbo N3 case can accommodate a double-width PCIe expansion card. There are two expansion slot brackets, with one beyond the edge of the standard mini-ITX form-factor. You can install a GPU card of up to 250 mm length.
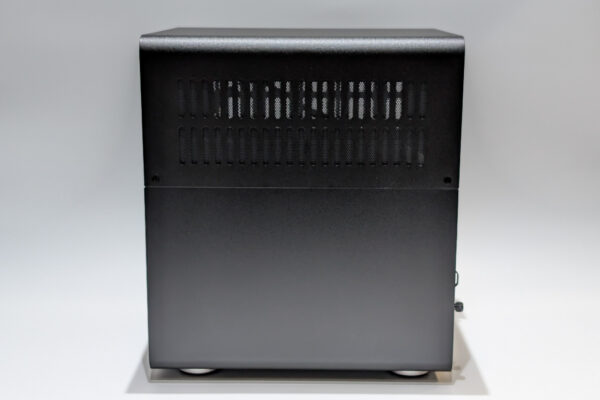
The sides of the top cover have generous ventilation slots, with fixed mesh filters on the inside. I’m quite certain that with the right fans, this case will have no problems keeping high-performance CPUs and GPUs sufficiently cooled.
The Jonsbo N3 case is very well-suited for a DIY NAS build. It’s reasonably compact while still being roomy enough for DIY projects. The 8x 3.5-inch hot-swap disk bays provide lots of storage capacity or options for future expansion. The support for 2x 2.5-inch fixed disks means you don’t have to sacrifice any of the 3.5-inch hot-swap disk bays for the operating system installation. It comes with 2x fans, supports 2 additional fans, and with excellent ventilation all around the case, this case will rise up to any thermal challenges you throw at it.
I’m impressed with the Jonsbo N3. The most negative thing I have to say of this case is about those rubber attachments for the hard disk drives, though this isn’t a showstopper. This is an excellent NAS case that you can tuck away in a corner, or put it on your desk if you have the space for it.
You can get the Jonsbo N3 on AliExpress, with some sellers offering it under US$100 during promotion periods.
Ps: This is the second of a three-part series that concludes with the Ultimate 2025 NAS Build post.
May I ask how did you connect the f_panel connector? I bought this motherboard and the jonsbo n3 case after reading your review but the f_panel connectors on the case and motherboard doesn’t seem to line up. I realised I could connect the f_panel cable to the com pin on the motherboard and it works? Thanks very much in advance?
Ah. This was one of the troublesome parts. The N3 case basically has two pairs of cables, one for the button and other for the LED around the button. The 1st two pins (counting left-to-right as the F-PANEL label faces you) are for the LED, and the other two are for the button. You’ll have to break out the cables (they are detachable, if you’re familiar with these things) and wire them as you need. I suppose the LED should only logically go the PW_LED on the mobo (pin 2-4), and for the button, I used it for reset (pin 5-7 on mobo).