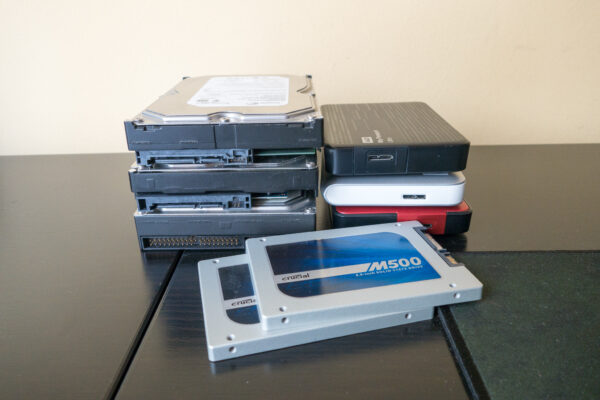
I’ve started to run my own private cloud storage service. It’s fronted by ownCloud, and the storage is backed by Btrfs across three hard disk drives. They run off a CentOS 7 home server. This has been something planned for some years, and it has taken longer than expected before I finally arrived at something I’m ready to label as production-ready.
The journey was a long one. Today, however, setup is surprisingly easy. The technologies that I was exploring a year or two ago were not yet stable then. Most notably, Btrfs was a little unreliable when I first tried to use it. I could reliably lose data in my destructive torture tests.
The situation now has improved significantly. CentOS 7 is released. It comes with Btrfs out-of-the-box, and it is even offered as an install option, although Red Hat labels it as a technology preview. OwnCloud has progressed significantly, and even though CentOS 7 is new, and RPM packages were not available at the outset, a repository is now available from which you can simply install ownCloud RPM package.
If you’re like me, seeing all the great benefits of cloud storage, but don’t like the idea of your private data being stored on some service providers’ infrastructure, you can build your own private cloud storage like I do.
- Build a PC with flexible, expandable, easily upgradeable storage (hard disks).
- Install CentOS 7. (See CentOS 7 On The Home Server)
- Build a Btrfs array with one or more hard disks. Btrfs enables you to easily expand storage by adding and changing your disks. (See Quick Btrfs Tutorial)
- Install ownCloud. (See notes below.)
- Where applicable, setup home broadband router to port forward HTTPS (of course you should use SSL) to the CentOS 7 server.
Installing ownCloud is really easy with prebuilt RPM packages. (It’s not much more difficult even if you had to install from the tarball.)
$ cd /etc/yum.repos.d/
$ wget http://download.opensuse.org/repositories/isv:ownCloud:community/Cen
tOS_CentOS-7/isv:ownCloud:community.repo
$ yum install owncloud
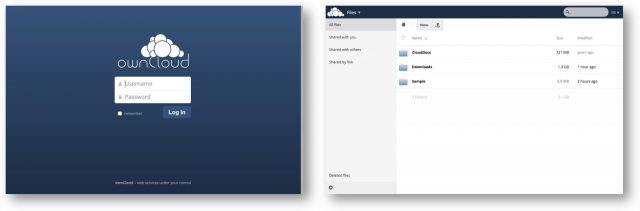
Go to your ownCloud URL (https://localhost/owncloud/) to complete the setup.
I’ve found that the SQlite database, while convenient, is hellishly slow. Make sure during the ownCloud setup to use MySQL instead. In CentOS 7, it is known as MariaDB, the community fork of MySQL since the latter has become part of Oracle. Choosing MariaDB (or MySQL) is really important. I found ownCloud service to be unacceptably slow using SQlite.
OwnCloud clients for OS X and Windows are free, and very affordably priced clients are also available for Android and iOS. If you absolutely don’t want to pay for a client on your mobile device, you can still access ownCloud via its web interface or through some other WebDAV client.
You don’t have to sync all your ownCloud content to your devices. The way I’ve my OS X ownCloud client setup is to only sync a folder on my Mac to a subdirectory in ownCloud. That’s right, I don’t want my entire ownCloud storage to be synced to my Mac. This way, I can designate a folder on ownCloud to be synchronised with my Mac, but leave other content in ownCloud to be accessed other ways.

As you can see above, the folder “CloudDocs” on my Mac is synchronised with the “CloudDocs” folder in ownCloud (earlier screenshot shows the folder on the server side). The reason for not wanting to synchronise the entire ownCloud storage is that I can store lots more stuff on ownCloud without needing the space on my Mac to contain the synchronised content. For example, the “Download” folder you see in the earlier screenshot of the ownCloud web interface does not get downloaded to my Mac.
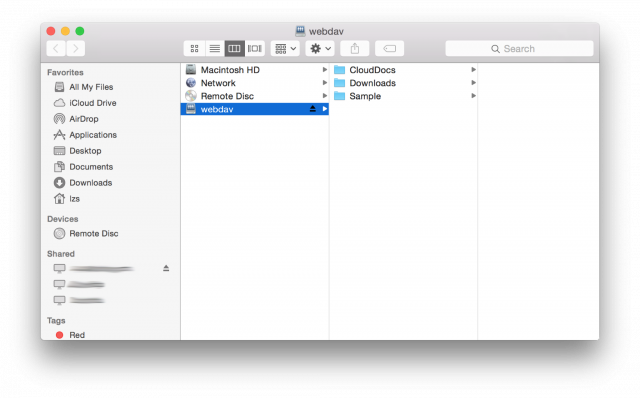
OwnCloud can be accessed in other ways outside of the sync client, and these other ways can provide the alternative for accessing content that doesn’t get synchronised. The web interface, of course, is one such way. But perhaps more useful is the WebDAV access method. In OS X, you can connect the ownCloud storage like a network drive. In Finder, press Cmd-K, then enter the Webdav URL of your ownCloud installation. The WebDAV URL is your ownCloud base URL appended with “remote.php/webdav”. So for example, if your ownCloud is at https://somewhere.com/owncloud, then the WebDAV URL is https://somewhere.com/owncloud/remote.php/webdav.
There are equivalent ways for WebDAV access in Linux and Windows. Check the ownCloud documentation.
Finally, here’s a look at the Android client. The client does the sane thing of not automatically syncing down all the content, but letting you choose file-by-file exactly what you want downloaded and cached locally. You can tell the client to keep the file up-to-date, so that server-side changes are reflected in the downloaded copy. You can also delete the local copy, without deleting the server-side file.

The Android client also previews Office documents, so you don’t actually have to have Office apps installed in your phone to view their contents. Screenshot above (last one) shows the built-in PDF viewer in action.
All things considered, I’m quite pleased with this private cloud storage solution. Google Drive, OneDrive, and Dropbox are all great services. I don’t imagine I’d give up on Google Drive, for example. But I certainly rather keep the bulk of my personal documents in my own cloud storage than to put them in someone else’s cloud infrastructure.
Just a note of caution. This is obviously not the solution for everyone. For example, if you can’t handle a Linux PC server, setting up SSL certificates, or port-forwarding on your broadband router, you should probably resign yourself to a cloud storage provider. Even for users who are technically competent, cloud storage services like OneDrive offer a really compelling value. Microsoft’s latest offer to Office 365 users is for unlimited OneDrive storage.
If, however, you must own your own the disks and infrastructure that your data is contained in, ownCloud seems like a great solution. Btrfs takes that further by offering you flexibility to grow and expand your disks as needed. There’s just one matter not covered: offsite backups and/or remote replication. This will be a topic for another day.
Great. Thanks for sharing.m