You might have heard of Docker and Parallels. The former is about packaging of software, along with their dependencies, inside a container that can be easily deployed. The latter is the company whose chief product, Parallels Desktop, is a hardware virtualisation solution for Mac computers. Did you know there’s Docker integration in Parallels Desktop?
Docker itself needs to run on Linux, as it makes use of resource isolation features of the Linux kernel to provide operating system level virtualisation, the key feature that isolates containers from each other. On Mac (and Windows) computers, Docker requires to run in a Linux virtual machine, and by default, the Docker Toolbox installer will install and setup Oracle VirtualBox for that purpose.
If you have Parallels Desktop installed on your Mac, then why bother with VirtualBox? That core part of Docker, the Docker Engine, can run inside Parallels Desktop. You don’t even need to have VirtualBox installed. Here’s a step-by-step tutorial.
Installation Steps
I’ll start off by assuming you already have Parallels Desktop installed. You’ll need at least Parallels Desktop 11 (PD11) Pro Edition, or Business Edition. Sorry, the basic edition of PD11 doesn’t include the Docker integration bits.
#1 – Install Docker
Download Docker Toolbox from the Docker website. This is an installer that will help quickly and easily install and setup a Docker environment in your Mac. There are some install steps to take note. The Docker Toolbox will automatically install Oracle VirtualBox. It is not needed if you’re going to use Parallels Desktop.
When the Docker Installer runs, on the Installation Type step, click on the Customize button.

This will give you the opportunity to customise and select what components of Docker to install. You do want everything, except for Oracle VM VirtualBox.

Proceed to complete the installation.
#2 – Install Docker Machine Parallels Driver
Next, you need to get the Docker Machine Parallels Driver. There are two ways to get this. The easiest is via Homebrew, if you already have Homebrew. Just run:
$ brew update
$ brew install docker-machine-parallels
Homebrew is basically a free and open source software package management system for OS X. If you don’t have Homebrew but want to get started using it, it’s real simple. Just run:
$ /usr/bin/ruby -e "$(curl -fsSL https://raw.githubusercontent.com/Homebrew/install/master/install)"
Otherwise, to install the Docker Machine Parallels Driver manually, run:
$ curl -L https://github.com/Parallels/docker-machine-parallels/releases/download/v1.2.0/docker-machine-driver-parallels > /usr/local/bin/docker-machine-driver-parallels
$ chmod +x /usr/local/bin/docker-machine-driver-parallels
Find the latest release on the Releases page.
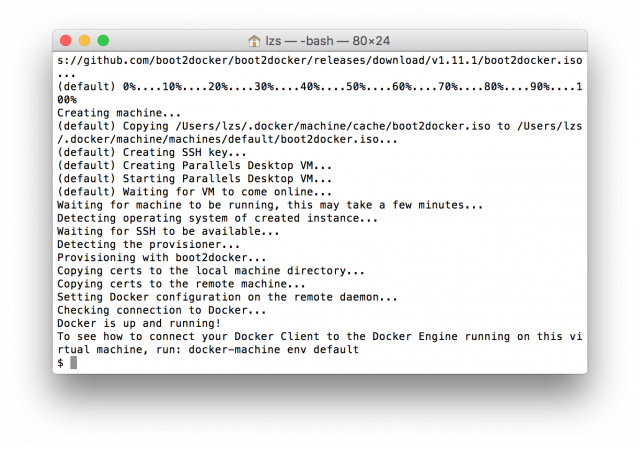
#3 Create Docker Machine in Parallels Desktop
Now, you need to create a virtual machine in Parallels Desktop for Docker to use. Just run:
$ docker-machine create --driver=parallels default
The default name used above works as long as you don’t already have another Docker Machine, which ought to be the case if you’re following this tutorial on a fresh Docker setup.
You may have to wait a few moments while your computer downloads stuff from the Internet to install.
Then, remember to execute this:
$ eval $(docker-machine env)
The Docker/Parallels setup is now complete. But we should test that.
#4: Hello-World Test
We’ll now run the Hello-World test just to make sure that everything is up and running properly.
$ docker run hello-world
You should see the “Hello from Docker” message, as in the below screenshot.
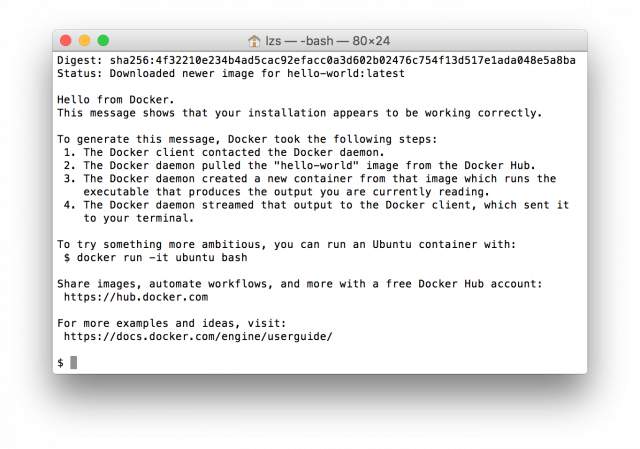
At this point, you know your Docker is up and running just fine.
Startup and Shutdown
Notice that a Linux VM is involved every time you want to use or run Docker. Before starting, you need to fire up the VM.
$ docker-machine start
By default, the default machine is started. You may need to re-setup your environment.
$ eval $(docker-machine env)
Finally, when you’re done, you should shutdown the Linux VM.
$ docker-machine stop
If your running Docker on a notebook, you probably don’t want a VM running all the time.
Wrap Up
You should now have gotten Docker and containers running via Parallels Desktop on a Mac computer. Ideally, you should just use Linux, since that’s basically that Docker needs. But I know, while many of us may be quite comfortable with Linux, using it on our own notebook is another matter altogether. If you’re a developer using a Mac computer, Parallels’ Docker integration comes in really useful.
View Comment Policy