Wi-Fi has become an essential utility in every home. The most basic setup commonly found is a single integrated Wi-Fi broadband router. For larger homes, mesh setups are commonly used. What’s my setup? It’s probably quite uncommon, though most likely not unfamiliar to prosumers.
Like most people, I have a Wi-Fi problem at home. There are blind spots. Then there are areas with finicky signal; Wi-Fi in those places works most of the time, but just not all the time.
Mesh routers are often the easiest solution to improve Wi-Fi coverage at home. There have been other technologies in the past, like WDS, as well as newer technologies like Wi-Fi EasyMesh that the Wi-Fi Alliance hopes will catch on, but manufacturer-proprietary mesh systems are the most common. Some companies try to make a mesh solution that works across their product line, like ASUS’ AiMesh.
But there is another way. People familiar with enterprise networking will know about controller-based Wi-Fi. Originally, this was meant to refer to a design where you have a central controller connected to lightweight access points distributed across physical areas. The controller is the “brains” of the system that provides all the intelligence and traffic processing capabilities, while the access points are “dumb”, mostly serving as physical radio interfaces. These days, things are more blurred, because lightweight access points are themselves quite smart, sharing some of the control and traffic processing capabilities.
The controller-based design is the approach I took for my home. I’ve been using MikroTik routers for several years. I did already have a controller-based setup previously, but it was mostly experimental. Apart from some “features” I didn’t bother to setup, I also did not install ceiling-mounted access points.
This time around, I wanted to get things sorted out properly. I was prepared to switch systems. Ubiquiti’s Unifi line of Wi-Fi devices came to mind, because they are quite well-known to prosumers. Unifi have many capable and feature-rich products.. Their newer models support Wi-Fi 6. The management UI appears to be easy to handle.
One of the things I’ve been disappointed with MikroTik is about their slowness in adopting new technologies. Wi-Fi 6 isn’t new, but it is notably absent in MikroTik’s product line up, as is WPA3 support, as well as anything faster than triple-stream radio support.
But as much as I wanted to jump ship, I am held back by Unifi’s sheer cost. It may seem like a bargain for businesses, but it isn’t for consumers. So I had to be practical, and considered which was more important: the latest and fastest Wi-Fi speeds, or use the money to buy more access points for greater coverage.
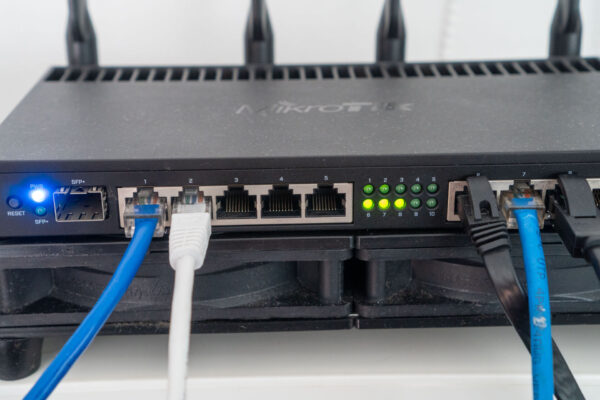
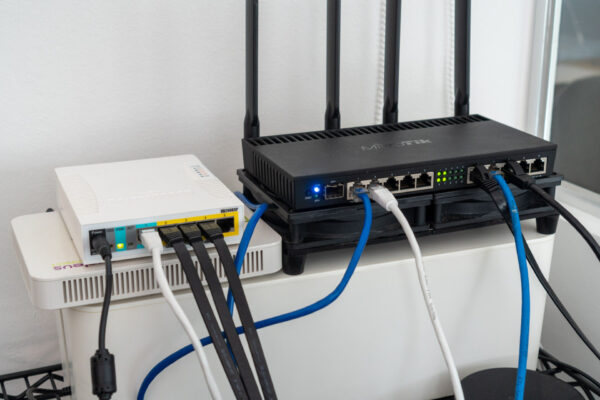
I stuck with MikroTik. I already have the RB4011iGS+5HacQ2HnD-IN (it’s annoying that MikroTik can’t give a simpler name to this product), since 2018, so I don’t need to spend any money to get a highly capable Wi-Fi router and controller. Mind you, this router already has 10 Gigabit Ethernet ports, and a 10 GbE SFP+ port. It’s a capable device, and it can also function as a Wi-Fi controller. MikroTik calls this CAPsMAN, an abbreviation for Controlled Access Point system Manager.
Now, one doesn’t need a high-end MikroTik router model to get CAPsMAN capability. This is a software feature, and since the same RouterOS, MikroTik’s router operating system, runs across all their router products, even a far cheaper S$100 “hAP ac2” (RBD52G-5HacD2HnD-TC) can operate as a Wi-Fi controller.
Since I’m continuing to use the same RB4011iGS+5HacQ2HnD-IN I already have, there’s basically no change in the “heart” of my network.
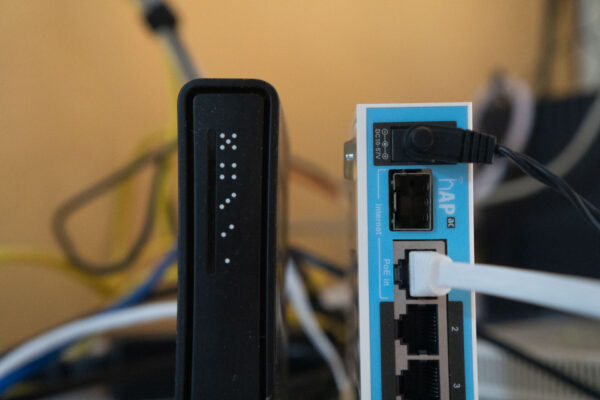
The new bits of my network are the access points. I bought three of the newer generation “wAP ac” (RBwAPG-5HacD2HnD). These sell for US$69 each. It’s a basic router, supporting dual-stream 2.4 GHz and dual-stream 5 GHz radios. It can run standalone as a broadband router on its own, or as in my setup, configured to operate as a Controlled Access Point (CAP).
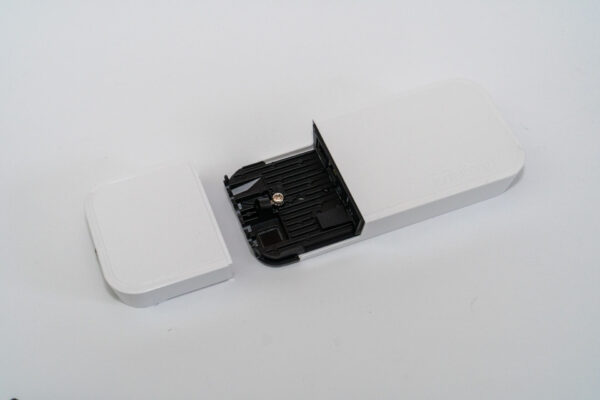
I have these CAPs connected by a wired backhaul. It is possible to use a radio backhaul, but that means sacrificing Wi-Fi bandwidth. There’s actually another important reason for using a wired backhaul.
These wAP ac CAPS support PoE. By using a wired backhaul, I can use a single UTP connection to provide both wired network access and power to the CAP. If you think a wired connection is troublesome, then you’re forgetting that putting a power point and running a power cord is also quite cumbersome. This is particularly so when I want to put multiple CAPs around the house, mostly ceiling mounted.
MikroTik includes passive power injectors with the wAP ac in the box, so you can get things going right away even if you don’t have a PoE switch available.
Unfortunately, my RB4011iGS+5HacQ2HnD-IN (that’s the main router) only has one PoE out port, not enough to support all my CAPs. I could buy a PoE midspan injector, which is basically in aggregation of individual power injectors. But I decided to go with a “cleaner solution” by getting a MikroTik RB260GSP PoE switch.
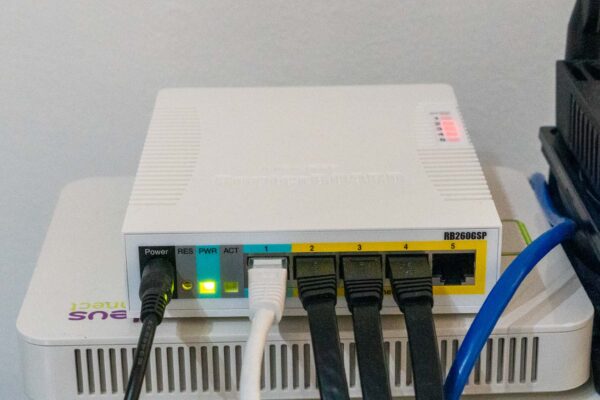
The RB260GSP is a managed switch running MicroTik’s SwOS (the operating system used across their switching products). It costs only US$44 (about S$88 from local seller). One reason for its budget-friendly price is that it’s a passive PoE switch, and does not support 802.3af or 802.3at PoE standards. That’s fine with me. Using one power brick to power the switch, which supplies power to 3x CAPs, is surely better than three power bricks for the individual injectors of each CAP.
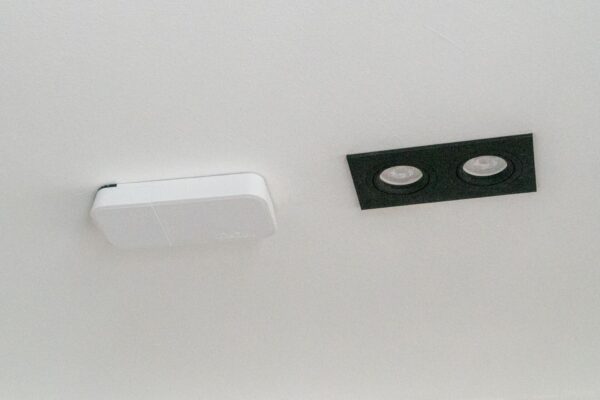
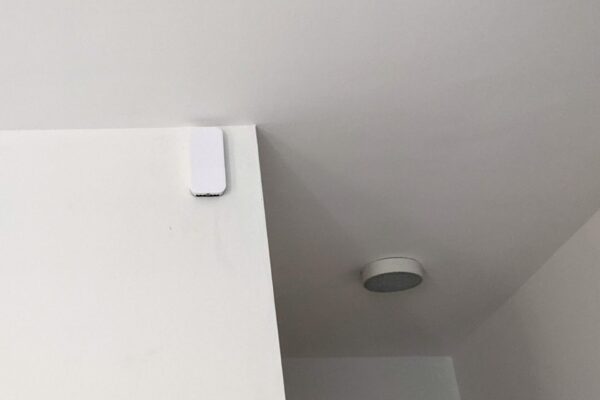
The RB4011iGS+5HacQ2HnD-IN itself has Wi-Fi, and whose Wi-Fi interfaces can be configured to be a CAP of its own CAPsMAN. This means I have a total of four access points. Three of them, the wAP ac devies, are very unobtrusively mounted, blending into the ceiling or wall, and easily go unnoticed.
My setup includes Guest Wi-Fi on a different VLAN, separate SSID for IoT devices, as well as an extra VLAN for connecting up all sorts of networked gadgets I get from time to time to review. MikroTik’s RouterOS is extremely powerful. You can read more in my RouterOS write-up. When you see features like OSPF, BGP, and MPLS, you should get a sense of where RouterOS stands.
Adding one more CAP is a trivial process. MikroTik routers can be “factory reset” into various modes, and one of them automatically configures it as a CAP and finds a CAPsMAN to talk to. This was how my wAP ac devices were all configured. (Though of course one would still want to get in to configure a admin password afterwards.)
While I like this network setup a lot, I must caution that MikroTik does have quite a high learning curve. This is particularly the case if you want a “custom” setup, and you are not all that familiar with network engineering.
Most end-users would be better served by “more regular” Wi-Fi routers and mesh systems. Even prosumers who are not familiar with network engineering will find other “prosumer” systems like those from Unifi more palatable.
However, if you are a networking fella, I think you’d be quite intrigued with a setup like mine. Apart from lacking Wi-Fi 6 and WPA3, this is a really capable network setup, and there’s likely nothing more “pro” you can find at this price point.
How big is your home? Nice on the different VLANs but multiple CAPs sounds a bit over…
Not big… but there’s bound to be problems with getting the “best” Wi-Fi everywhere 🙂
It looks there is a typo here.
“Mind you, this router already has 10 Gigabit Ethernet ports, and a 10 GbE SFP+ port. ”
The Ethernet ports are 1 Gigabit instead of 10 Gigabit. Only the SFP+ port is 10 Gigabit. (It can reach 10 Gbps only if used as a router on a stick though, all other use cases its 5Gbsp)
Hi, this is an awesome blog. Thanks for sharing!
Even though I went with another approach you mentioned (only one U6-LR for now, I got one recently because Ubiquiti launched the Singapore online store, S$279, still ok to buy one and scale it out later, but now it seems all U6-LR has been sold out), your approach is inspiring to me.
I just hope apart from Wifi 6 and WPA3, you have Wifi roaming supported well. 😀
Hi! Singapore friends! I have been looking for a Mesh network configuration method for Mikrotik devices using wired backhaul recently. Unfortunately, there is no corresponding case tutorial on the Internet, even the official Mikrotik document does not. It only mentions that the physical network port can be added to the Mesh network. .
I saw that you mentioned the use of “wired backhaul”, but did not specify whether to use the Mesh network to achieve Wi-Fi wireless roaming, I specifically asked you about the configuration method, I hope you can give me any advice, thank you!
I’m not using mesh. My MikroTiks are configured in CAP mode (i.e. a controller-based setup). One AP needs to be designated a CAPsMAN, while all others are configured as a CAP (i.e. a controlled AP). The AP that is a CAPsMAN can also be a CAP (i.e. in its Wireless configuration, enable CAP, and point the discovery interface to itself).
Thank you for your reply. It seems that it is impossible to realize the wire backhaul of mesh network on Mikrotik. I have been struggling with this because I have seen that other brands’ products have this scheme, and I am convinced that Mikrotik is not inferior to other brands. Unfortunately, the result is cruel.
I currently have three single-band Mikrotik devices (RB951Ui-2HnD) on hand, because the installation points of the three APs are all laid with network cables, so I plan to find a Mesh network configuration solution that can use “wired backhaul”, which can simultaneously Enjoy the seamless roaming of mesh networks and the stability of wired backhaul without having to repurchase dual-band Mikrotik equipment.
Unfortunately, after searching on the Internet for half a month, I couldn’t find a practical configuration solution.
In the introduction of HWMP+ in the official document, there is an explanation about adding ethernet to the Mesh network. Could it be that it is not for the requirement I described?