Most people appreciate the need to protect their privacy and keep their data safe. Protecting the devices we use is important, and if you’ve not paid any particular attention or taken any specific steps, you should do it right away. For Mac users, fortunately, this is easy. Many features are already built into macOS.
Mac computers are relatively secure by default, but you shouldn’t take that for granted, or assume that you don’t need to do anything else. While the Mac is not free from malware, and it’s still true that there are more malware targeting Windows computers than Mac computers, that doesn’t make it less important to protect your Mac.
1. Enable Firewall
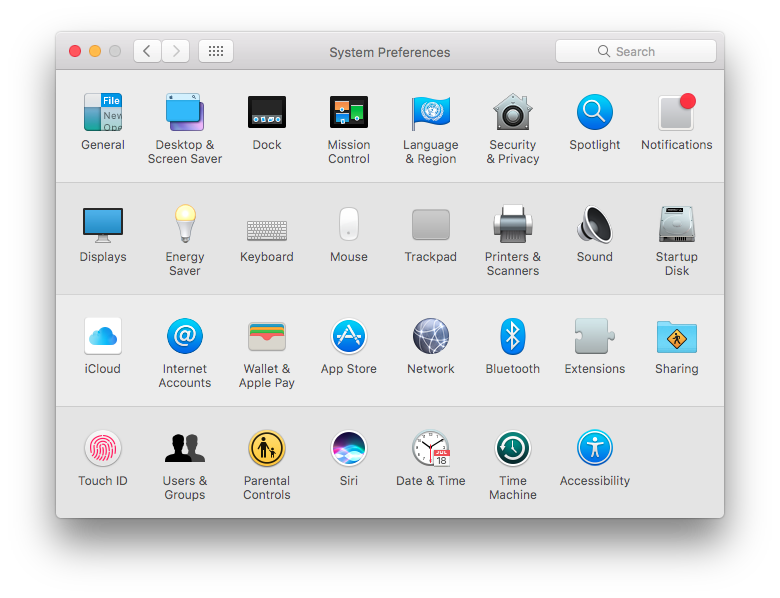
I’ll start with some basics. Many of the recommended macOS settings are found in System Preferences. Click on the Apple logo in the top left corner of the screen, then System Preferences in the menu. The first thing we’ll do is to enable the built-in macOS firewall. This controls what network accesses are permitted on your Mac.
Once the System Preferences app opens up, click on Security & Privacy., then click on the Firewall tab. The settings are likely locked, so click on the padlock icon in the bottom left of the window, then enter your Administrator credentials, which is likely your own Mac login account.
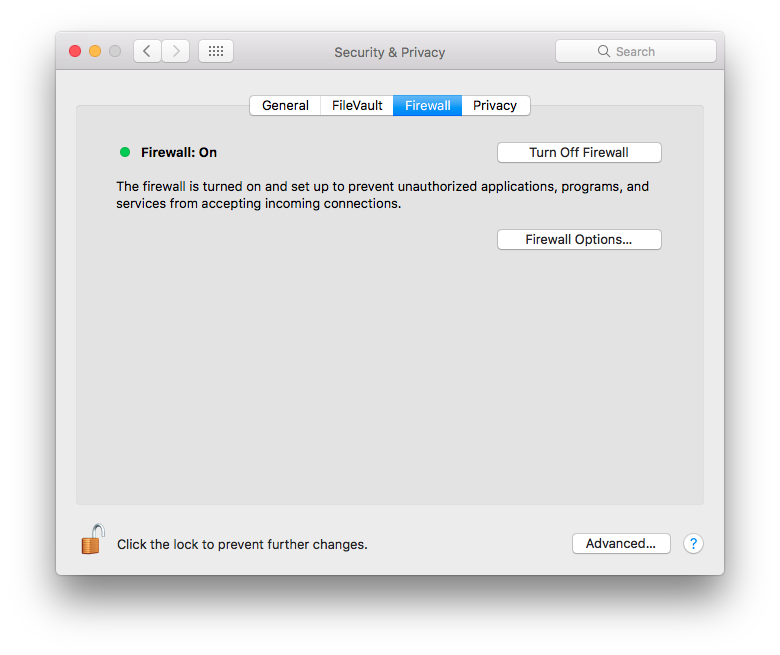
Next, click on Turn On Firewall. Then, click on Firewall Options, and in the new dialog that opens up, click on the Enable stealth mode checkbox to enable the feature.
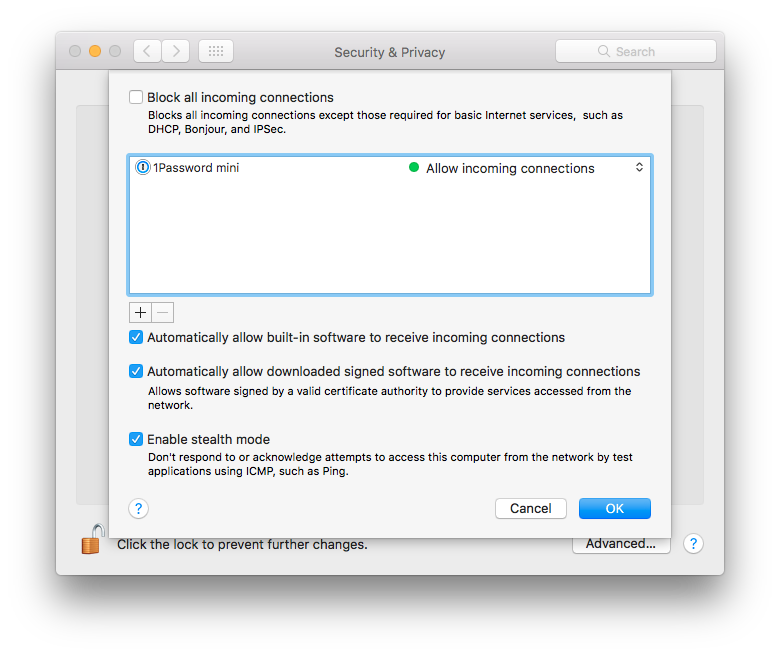
If you are not going to enable any services on your Mac, like sharing your screen, files, printers, or the likes, you can also go ahead to enable Block all incoming connections. Your Mac can still access the Internet, but your Mac will be pretty much inaccessible from any remote users.
2. Screen Lock Settings
You want to make sure your Mac is locked up whenever you leave it unattended. If you forget, a screen lock can help save the day. Otherwise, someone can come by and help themselves to information inside your Mac.
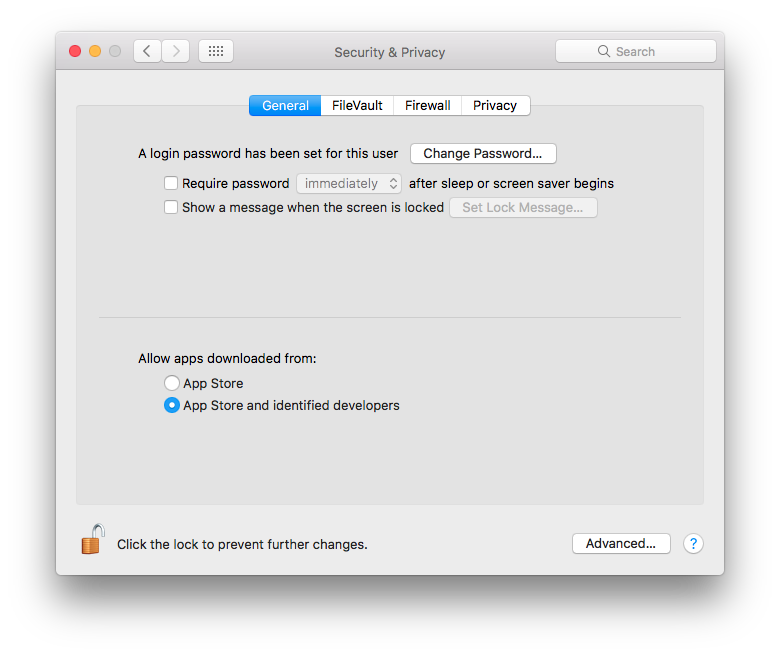
Continuing from the Security & Privacy page above, click on the General tab. Make the appropriate changes to require password immediately, or if you prefer, after a very short delay, after Mac sleeps or the screen saver kicks in.
Of course, remember to check that your screensaver is configured and activated. This is found in Desktop & Screen Saver from the main System Preferences page (click on Show All to get there), then click on the Screen Saver tab, then choose an appropriate time at the bottom of the window.

3. Disable Automatic Login
On the General tab of the Security & Privacy page, there may be an option to disable automatic login. You should check that checkbox, so as to disable automatic login. This is important, because otherwise anyone who finds your Mac can simply reboot it and log right into your account without needing a password.
The option is not available in my screenshot above because I have another feature, FileVault, turned on. I do strongly recommend turning on FileVault, but I’ll come to that later.
4. Turn On FileVault
Apple’s FileVault is a full disk encryption feature. You can read more about securing your Mac with FileVault, but briefly, it’s a macOS feature that encrypts your Mac’s storage. Only authorised users can decrypt the storage. If your Mac is stolen, the thief would not be able to retrieve any information from the storage, not even in recovery mode, booting from another disk, or copying the storage to another system.
FileVault is so easy to use that you should just turn it on. Find this in System Preferences, Security & Privacy, and in the FileVault tab, just click on Turn On FileVault.
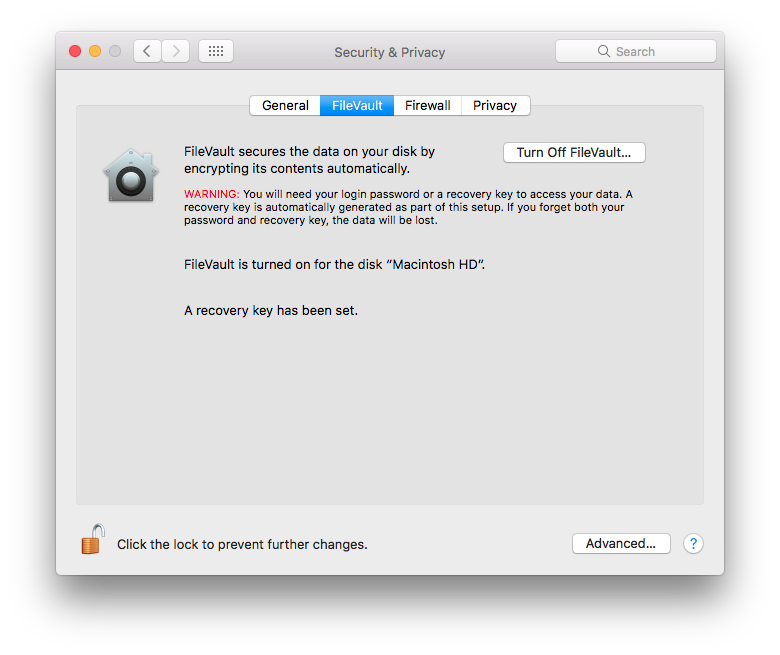
Read the information provided, particularly concerning recovery keys which, like your passwords, should be properly protected. Access to the storage depends on your account credentials, so make sure you choose a good, strong, password on your Mac. Otherwise, anyone who can guess your password can boot up and login to your Mac, and thus access all your files.
A nice benefit of FileVault is that if you ever have to send in your Mac for repair, the service technicians won’t be able to see your files. There is no need for them to ask you for your password. If you decide to sell or dispose of your Mac, you needn’t worry about erasing your files. Technically, simply forgetting your password is sufficient.
5. Turn On Time Machine
Apple first introduced Time Machine almost 10 years ago, in 2007. It’s a no-brainer backup solution for the Mac. Just turn it on, plug in an external hard disk, and it quietly does its magic in the background.
A comprehensive backup strategy is your best protection against accidental file deletion, corruption, physical theft, and even ransomware. I strongly recommend Time Machine to everyone because it’s so simple to use.
In System Preferences, click on Time Machine.
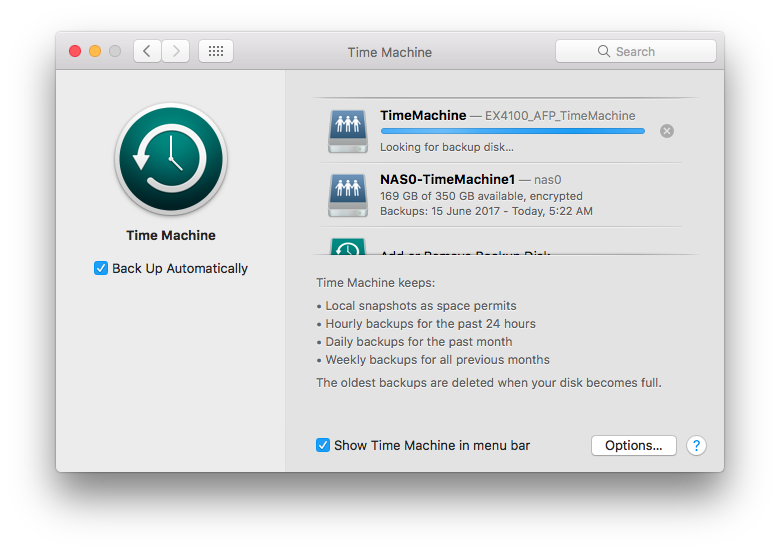
Just turn on Time Machine by enabling Back Up Automatically. Then connect a portable hard disk or other external hard disk, and tell Time Machine to use that disk. I also recommend encrypting the backups, particularly if there is a risk that your Time Machine backup disk may get stolen. Protecting your Mac is one thing, but remember that your data backed up elsewhere could also be vulnerable to theft.
6. Turn On Find My Mac
Apple’s iCloud has a neat Find My Mac feature. If your Mac is stolen, and if it somehow manages to connect to the Internet, you may be able to locate it from iCloud. To enable Find My Mac, go to System Preferences, click on iCloud, then scroll down the list to locate the Find My Mac item, then ensure the checkbox next to it is checked.
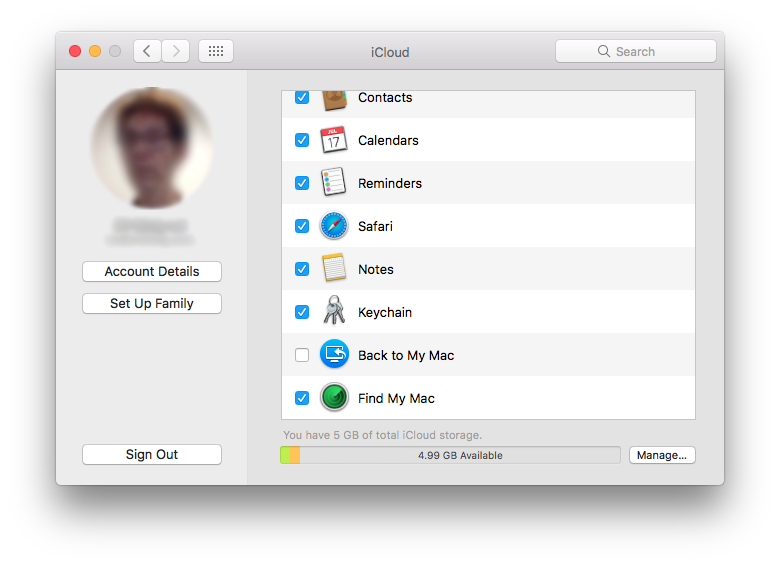
If you lose your Mac, head to https://www.icloud.com/, then click on Find iPhone. Oh yes, finding Macs, iPads, and iPhones, they’re all in the same place.
It is recommended to have the Guest account enabled. To do so, in System Preferences, click on Users & Groups, then select Guest User from the list of users, and enable Allow guests to log in to this computer. If your Mac is stolen, and the thief cannot login to your account (hopefully, since you should have had a good strong password), perhaps he or she will try the Guest account, then connect to the Internet, then that will allow iCloud to locate your Mac.
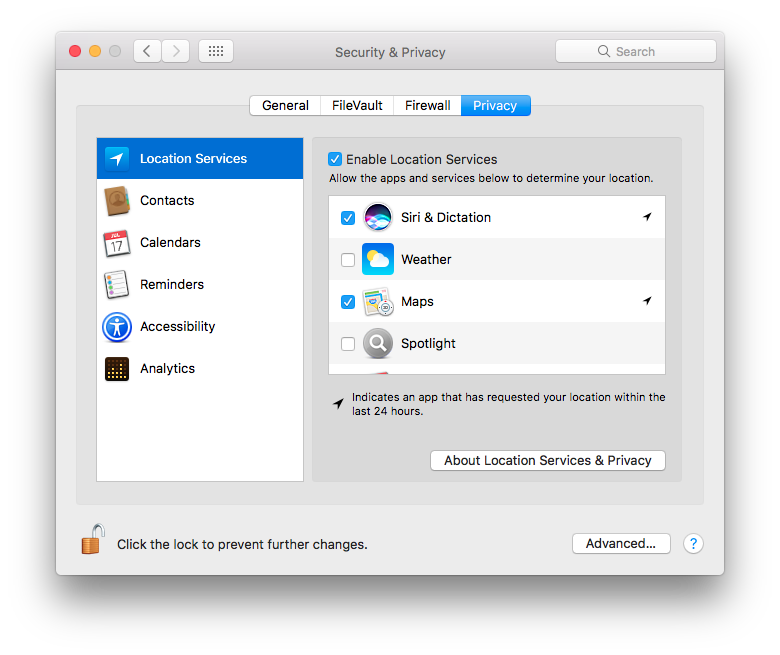
7. Review Your Privacy and Sharing Settings
Understand the privacy and sharing settings that is used on your Mac. Among all the privacy settings, the location services might perhaps be of greatest concern. In System Preferences, click on Security & Privacy, then in the Privacy tab, select Location Services from the list on the left, and find out which apps have access to your location. Remove access from any apps you don’t think should need to know your location.
Also, from the main System Preferences page, click on Sharing, to list services that you may be sharing out from your Mac.
8. Updating Your Mac Software
Keeping your Mac software is absolutely critical to ensure that you are fully patched as quickly as possible against security vulnerabilities. The macOS operating system itself, as well as all Apple software and other software installed through the Mac App Store are easily updated through the store itself. To check manually, launch the App Store app, then click on Updates.
Don’t forget other software that you have installed through other channels. Software like Microsoft Office and apps from the Adobe Creative Cloud suite have their automatic update tools, so you just need to make sure they are working. Do find out how other software you’ve installed are updated, and if necessary, check for updates manually.
Unlike other steps which are typically one-off settings, software updates are never-ending, and it will be prudent to check from time to time that automatic updates are actually still working.
Conclusion
The 8 steps listed above are by no means exhaustive. I do consider them the essentials that everyone must do. They don’t require any additional software to install, nor do they cost extra, so there’s little reason why not to do them. There are certainly more things you should be savvy about, such as phishing attacks, running apps from untrusted sources, etc. This could be the subject of another post at a later time.
Regardless, you need to care about your own security and privacy. Take action now.
View Comment Policy